CPR Resource Center
The most comprehensive library of emergency training resources — including videos, articles, downloads, and more.
The most comprehensive library of emergency training resources — including videos, articles, downloads, and more.
Code One uses the Resuscitation Quality Improvement Program (RQI) for verification of skills during BEACON skills appointments. RQI is a computer program that monitors and helps to improve the accuracy of cardio pulmonary resuscitation (CPR) by assessing the depth, recoil, and speed of compressions along with measuring volume and time it takes to provide breaths.
While many students enjoy the feedback provided by RQI, some find it more challenging to meet AHA CPR standard on RQI than they did in previous instructor-led courses. Here are 5 secrets to help ensure you have a successful BEACON session:
To ensure adequate compression depth, first make sure you have proper hand placement. We want to place the heel of your hand center on the chest over the breast bone. If your hands are too high or too low, compressions will not be as effective, and RQI will measure them as too shallow.

Next, we want to position ourselves over the manikin, allowing us to push directly down on to the chest. The RQI manikin is placed on a stable and secure cart, but the height of the manikin’s location can make compressions more challenging. There is a step stool located on the cart under the infant manikin or already out for your use. Placing that stool beside the manikin and aligned with their chest while standing on it enable you to position yourself over the manikin’s chest. Once on the stool, you can hinge at your hips using your core strength to push down and provide deeper compressions.
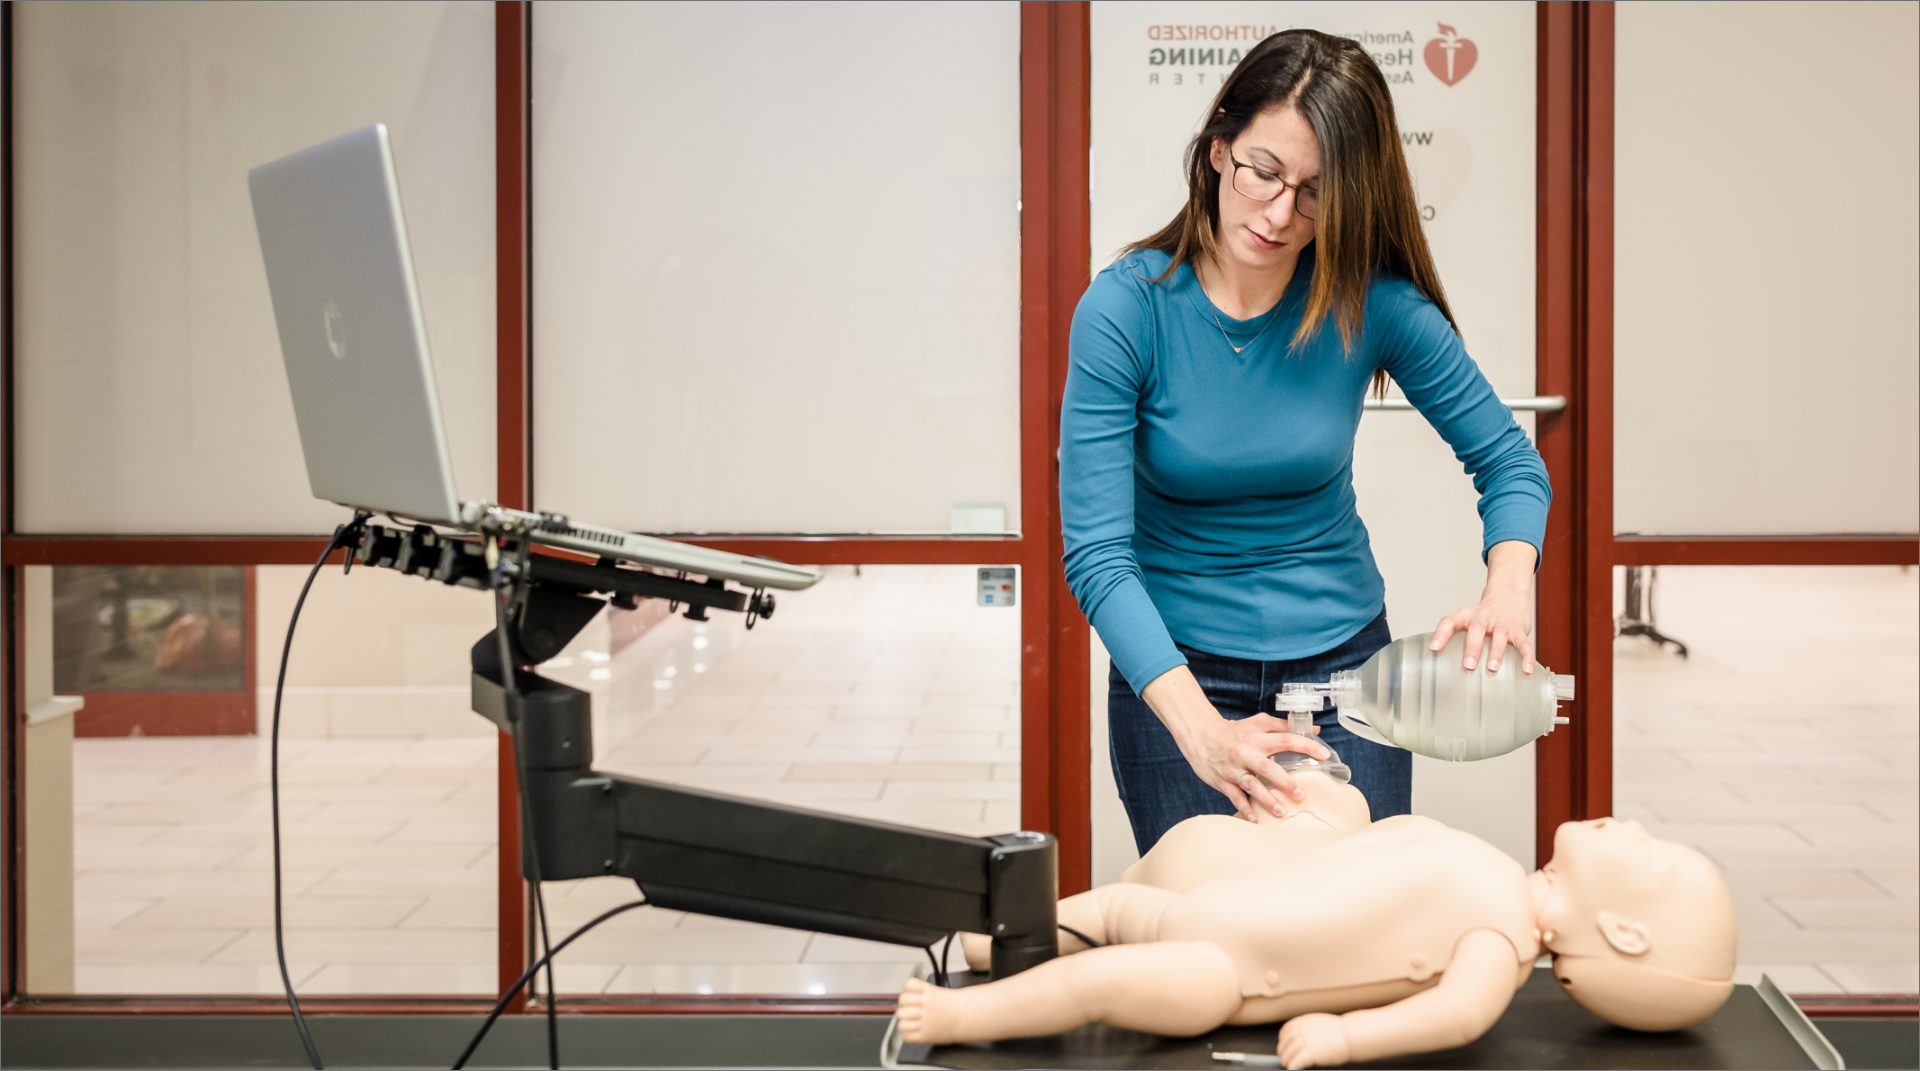
To ensure the proper placement, you want to stand at the side of the cart, above the manikin’s head. This will be demonstrated for you in a quick video before you begin. Place the pointed end of the mask over the bridge of the nose and the wider rounded end of the mask at the bottom of the manikin’s lip on top of the chin. If the bottom of the mask is placed over or beneath the chin a seal will not be made and the air will escape.

When providing ventilations, it is important that we place the mask correctly over the manikin’s mouth and nose so that we can get a tight seal. If we do not create a tight seal the air provided when you squeeze the bag will leak out of the mask instead of entering the manikin’s lungs.
In addition to mask placement, in order to have successful ventilations, you will have to tilt the head back and lift the chin up when providing ventilations to maintain an open airway.
During skills, you will be required to provide 12 breaths at either 6 second intervals for the adult and child manikin or 3 second intervals for the infant manikin. The purpose of this skill is to test accuracy of rescue breaths. Rescue breaths are designed to be given over 1 second, meaning it should take you 1 whole second to squeeze the bag then count your 6 or 3 second interval before squeezing the bag again. Providing breaths at 6 second intervals for older children and adults mirrors our normal breathing pattern while 3 second intervals mirror the normal breathing pattern for infants.
When we are nervous, such as in a testing scenario, it common to count extremely fast. Ensure you are counting seconds and not just count to 6. If you know you tend to talk or move faster when nervous count by saying 1 one-thousand, 2 one-thousand, 3 one-thousand, etc.
During the skill for 2 person CPR, RQI will play the role of your partner. The top skill being assessed here is following the recommended ratio of 30 compressions and 2 breaths for the adult/child manikin and 15 compressions 2 breaths for the infant manikin.
What this boils down to is that it is important to count your compressions. During adult/child CPR, your partner will be ready to give their 2 breaths once you complete 30 compressions. Therefore, it is important that you pick your hands up off the manikin’s chest when you complete your 30th compression. If we do more than 30 compressions it will interrupt our partners ability to give 2 breaths, as they will not be able to inflate the lungs while we continue to compress the chest.
Last but not least, ask a question if you are unsure about something. There is not such thing as a bad question, and your instructor will always be happy to answer and make this as smooth and engaging of an experience as possible.
After each skill is completed, you will see your score and feedback from RQI, if you did not meet the required score additional tip videos will be available to assist in giving a visual of these key tips discussed, and other common areas of improvement.
Don’t forget to take a deep breath, the skills appointment is not here to intimidate or fail anyone, it exists to build confidence in your skills. There is no limit to how many times we can retake/practice each skill.
Help Me Find a Course